How to Create a WhatsApp Order Form
Stop losing orders to messy WhatsApp text messages. Here's how to build a proper order form that sends everything directly to your WhatsApp in one clean message.

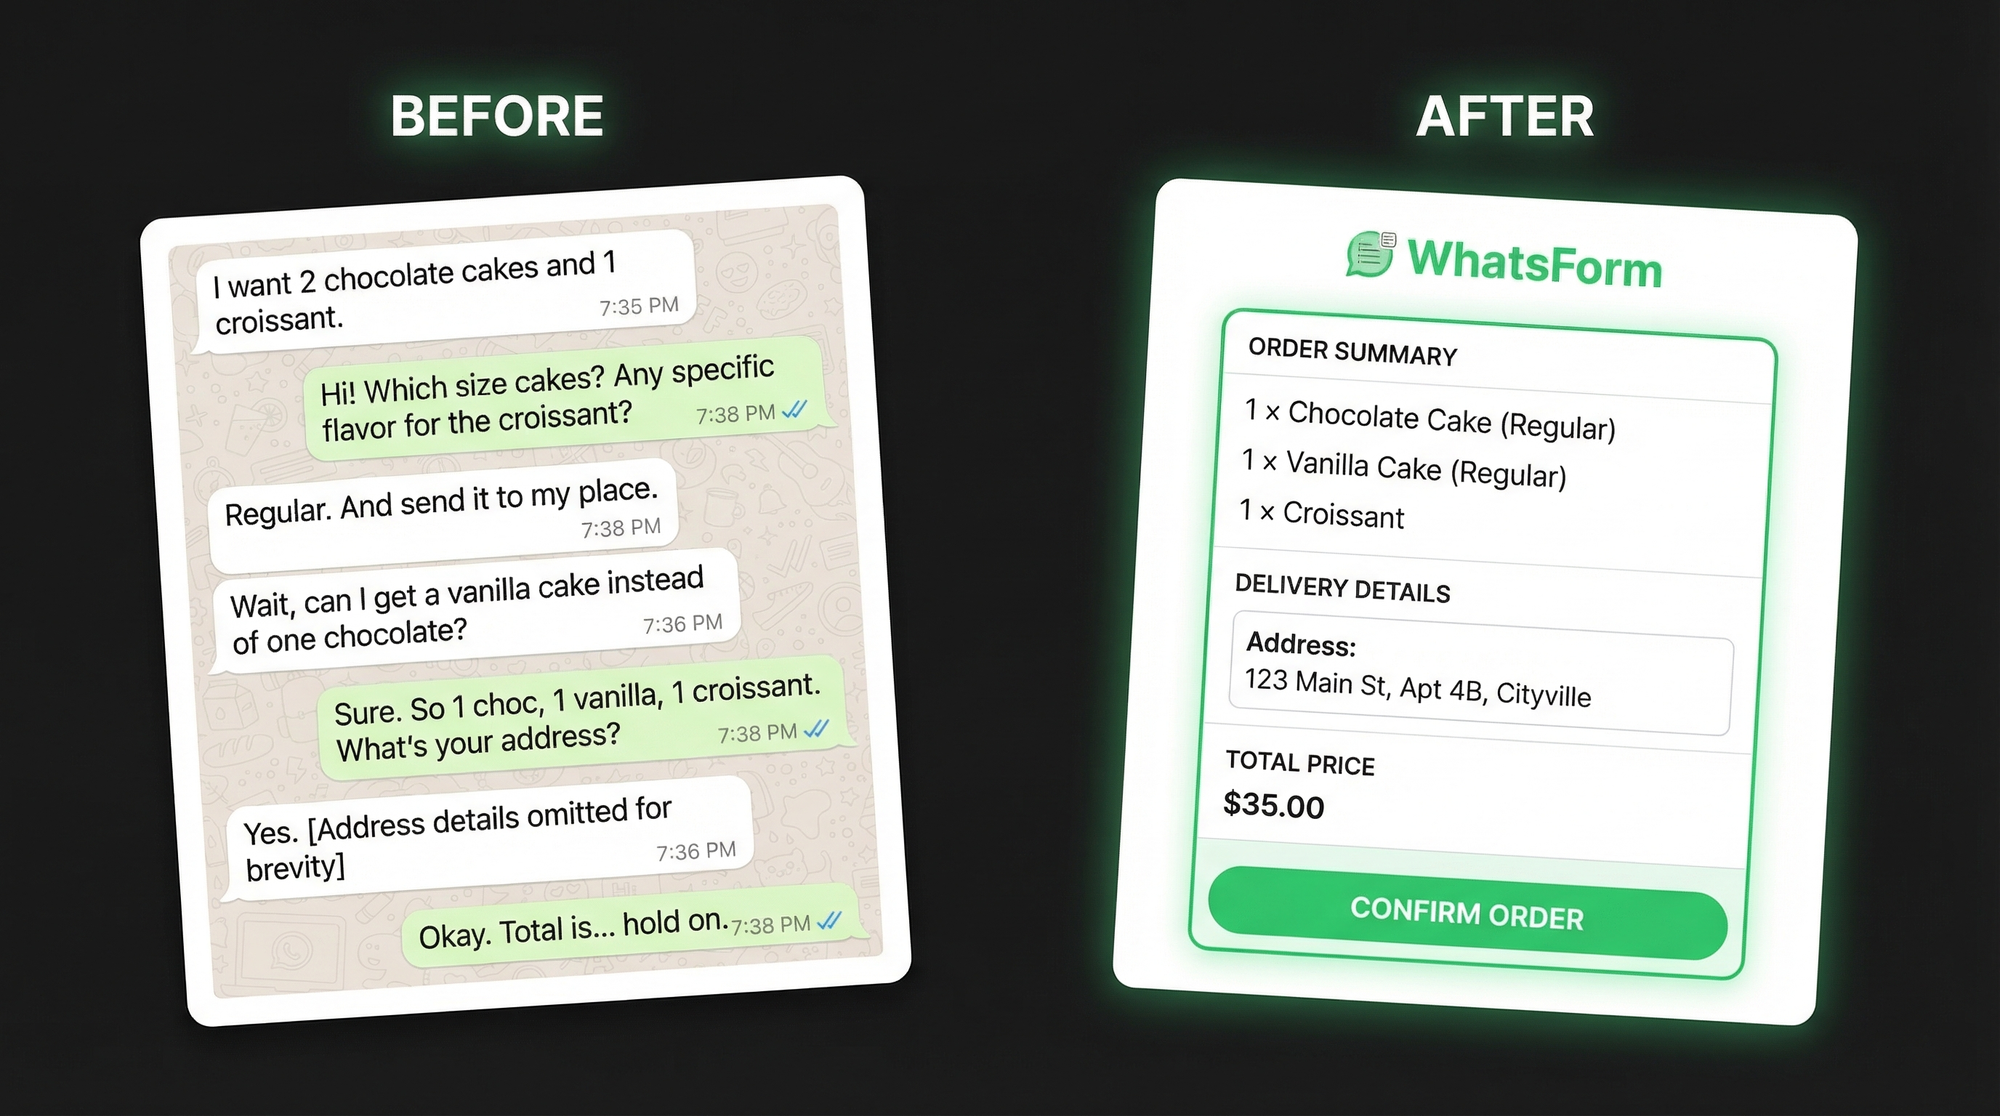
If you run a restaurant, a bakery, a small clothing brand, or any business that takes orders over WhatsApp, you already know the problem. Customers send messages like "I want 2 chocolate cakes, maybe 3 actually, and can you do a delivery to Midtown by 6pm? Also what’s the price?" And then you spend the next 10 minutes going back and forth trying to figure out what they actually want.
Text-based orders miss details. They’re hard to track. And by the end of a busy day, your chat is a mess of half-confirmed orders and unanswered questions.
A WhatsApp order form fixes this. You create the form once, share the link, and every order lands in your WhatsApp as a clean, structured message with all the details you need. No back and forth. No missing info.
Here’s exactly how to build one.
Why text messages don’t work for orders
When customers text their orders, you’re the one doing the work. You ask for the item. Then the quantity. Then the size. Then the delivery address. Then the phone number. Then the payment preference. That’s five or six messages just to take one order.
An order form flips this. The customer fills in everything upfront. You receive one message with all the details neatly organized. You spend zero time chasing information and more time actually fulfilling orders.
We wrote more about this in our guide on switching from Google Forms to WhatsApp if you want the full picture. But for now, let’s build the form.
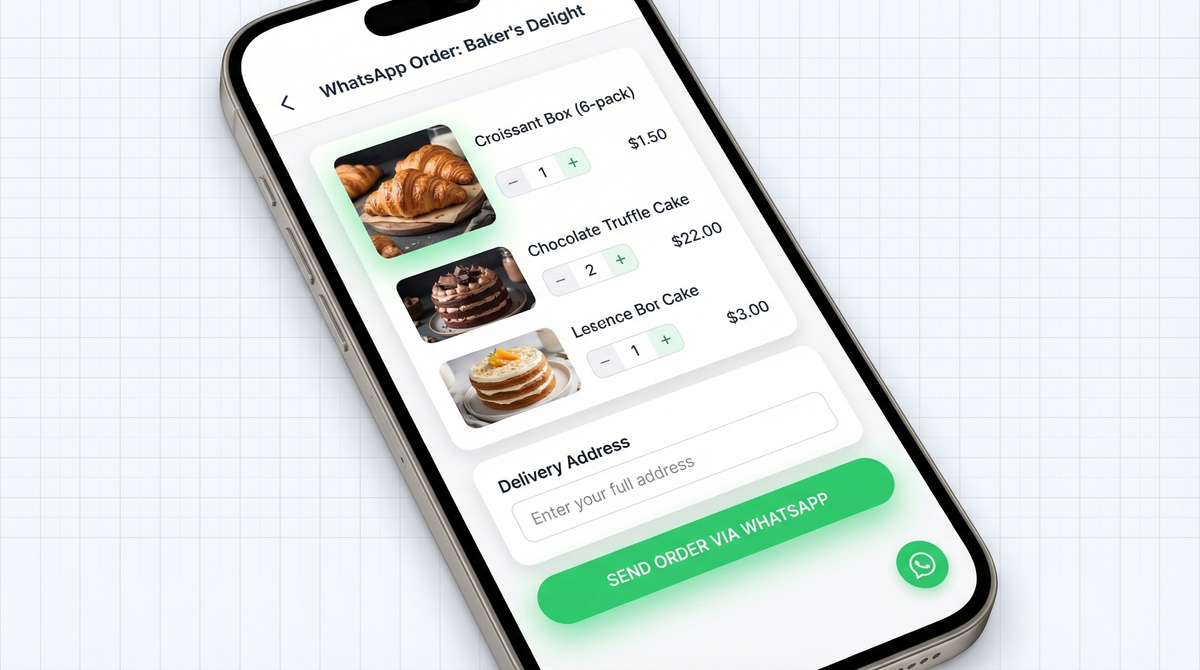
What a WhatsApp order form looks like
Before we get into the steps, here’s what the experience looks like for your customer. They open your form link. They see a clean page with your product options, quantity selectors, their delivery address fields, and a payment choice at the bottom. They fill it in and hit submit.
You immediately get a WhatsApp message that reads something like:
New order from Sarah Mitchell
Items: Chocolate cake x2, Croissant x3
Delivery address: 247 Oak Street, Austin, TX 78701
Delivery time: April 22, 6:00 PM
Payment: Credit card
Phone: +1 (512) 555-0183
That’s it. Everything you need in one message. No follow-up questions required.
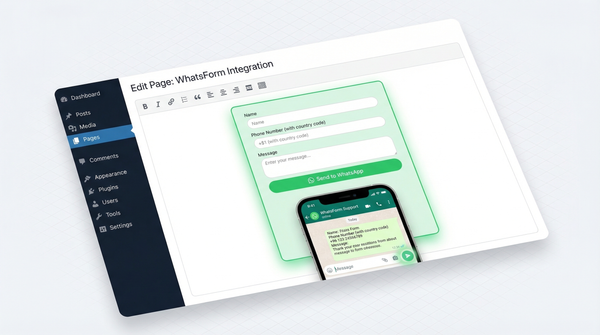
Step 1: Sign up on WhatsForm
Go to WhatsForm and create a free account. No credit card needed. Full disclosure: we built it, and we use it ourselves.
The free plan is enough to get your first order form live. You can create a WhatsApp order form free of charge and start receiving orders immediately. You can upgrade later if you need more forms or advanced features.
Step 2: Create your order form
Once you’re in, click “Create new form.” You have two ways to get started.
The fastest option is the AI builder. Just tell it your industry and use case. For example, "bakery, order collection" or "clothing brand, lead generation". It will auto-generate a form with the right fields already in place.
If you prefer to do it yourself, pick the Order Form template from the library. It comes preloaded with the most common order fields so you’re not starting from scratch.
Either way, you can fine-tune everything after using the drag and drop builder. Add fields, reorder them, change labels, whatever you need.
Check out our help guide on creating your first WhatsApp form if you get stuck at any point.
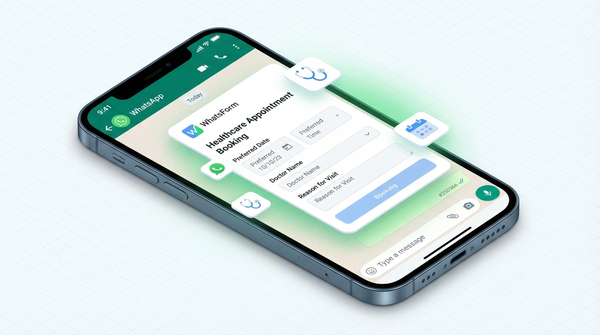
Step 3: Add your product fields
This is where you tell the form what customers can order. A few field types that work well for order forms:
- Dropdown or checkbox list for product selection (e.g., “Choose your items”)
- Number field for quantity
- Dropdown for size or variant options (Small, Medium, Large)
- File upload if you do custom orders and need reference images
Keep the product section focused. If you have a long menu, group items by category. Fewer choices per screen means customers complete the form faster.
Step 4: Add customer info fields
After the product fields, add the fields you need to actually fulfill the order:
- Name (text field)
- Phone number (phone field, so you can call or message them)
- Delivery address (long text or address field)
- Delivery date and time (date/time picker)
Only ask for what you actually need. Every extra field is a reason for someone to abandon the form halfway through.
Step 5: Add payment options
WhatsForm lets you add a payment field so customers can choose how they want to pay. Common options to include:
- Cash on delivery
- Credit or debit card
- PayPal
- Venmo
- Bank transfer
You can also accept actual payments inside the form if you want to collect money upfront. Our guide on accepting payments walks through how to set this up.
Step 6: Connect your WhatsApp number
In your form settings, enter the WhatsApp number where you want to receive orders. This can be your personal WhatsApp, your WhatsApp Business account, or any active number. Most businesses use their WhatsApp Business number so customers see the business profile when they message.
When a customer submits the form, their WhatsApp opens and sends the order directly from their number to yours. That first message kicks off a real conversation between the customer and your business, right inside WhatsApp. You’re not just collecting form data; you’re starting a chat that you can follow up on, answer questions in, and build a relationship from.
No dashboard to check. The order comes straight to your phone and the conversation is already open.
Step 7: Share your form link
Your form is live. Now get it in front of customers. A few places that work well:
- Your website or landing page: Add a “Place order” button that links to your form
- Instagram bio: Replace the generic link with your order form URL
- WhatsApp status: Post the link with a short caption like “Order here”
- QR code: Generate a QR code from your form URL and print it on packaging, menus, or your shop counter
WhatsForm generates a QR code for every form automatically. Check the QR code help article for how to download and use it. You can also read more about sharing your form link in different contexts.
If you use WordPress, there’s a WhatsForm WordPress plugin that makes embedding even simpler.
Bonus: manage orders from your phone
Once orders start coming in, you can manage them directly from the WhatsForm app. See all your form responses, export them, and keep track of what’s been fulfilled.
Download it here:
It’s useful if you’re running a one-person operation and want everything in one place without switching between apps.
That’s it
For a detailed walkthrough, check our help center guide on creating your first WhatsApp form.
Creating a WhatsApp order form takes about 10 minutes the first time. After that, every order you receive will have all the information you need, sent directly to your WhatsApp the moment someone submits the form.
No more back and forth. No more incomplete orders. Just clean, structured messages you can act on immediately.
Start with WhatsForm and customize it for your business. You’ll wonder how you managed without it.